In a recent post, I showed you how to create an HTML email signature on iPhone or iPad, which led some of our readers to come up with a variation of this topic, asking how to add the image of a handwritten signature to an email signature on iOS.
As it turns out, the process is exactly the same and can be done in a few steps. In this post, I’ll walk you through the steps to create a handwritten email signature image to add to your emails sent from iPhone or iPad.
I must say I’m not a fan of that type of signature. To me, it screams 1998, but I guess it’s a personal preference. If you’re into that, then read on, but my personal advice would be to not use images in your email signature as it might cause formatting issues in some email clients.
Step 1:Â On your computer, open up your web browser and go to your favorite email client. I personally used Gmail for the purpose of this tutorial, but I assume it works the same with other services such as Outlook.
Note that it is important you perform this step from a web browser rather than a mail application on your computer. I’m not sure why, but if you were to do this from a mail app, the signature wouldn’t be persistent and the image would disappear after a while. While I can’t say what the reason is for sure, I believe it has something to do with caching. When you create an image via an email service on a web browser, I assume this signature image file is stored online, which could explain why it is persistent and doesn’t disappear.
Step 2:Â Create the signature you want and add an image of your handwritten signature. There are many ways you can get an image of your handwritten signature, such as using a scanner, or taking a photo. For fastest and best results, I would suggest using the Scannable app [1] , which is free in the App Store.
To create a signature in the email service of your choice, simply go to the settings of this mail service.

In Gmail, I used the “Insert Image†button to add the image of my signature
Note that after experimenting with different sizes, it seems the sweet spot for that image is around 250px wide. Anything wider makes it look goofy.
Step 3: Depending on your setup, you might have to assign that newly created signature to a specific email address. For example, I’m going to assign my Handwritten signature above to my personal email address.
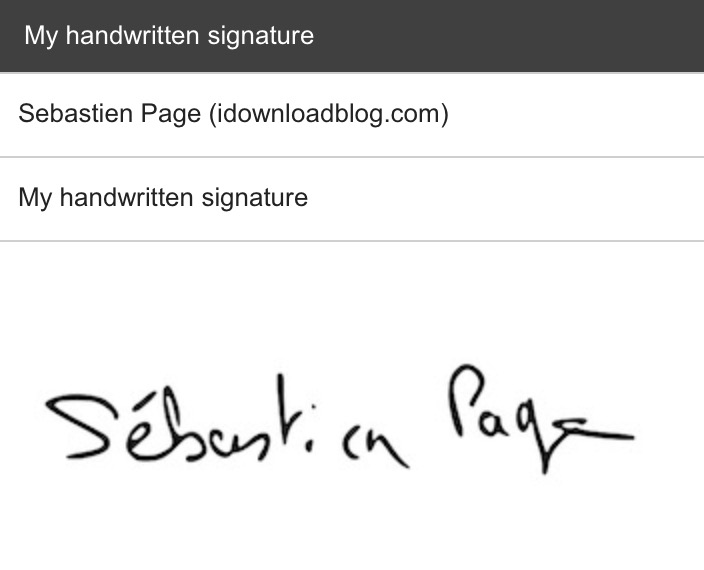
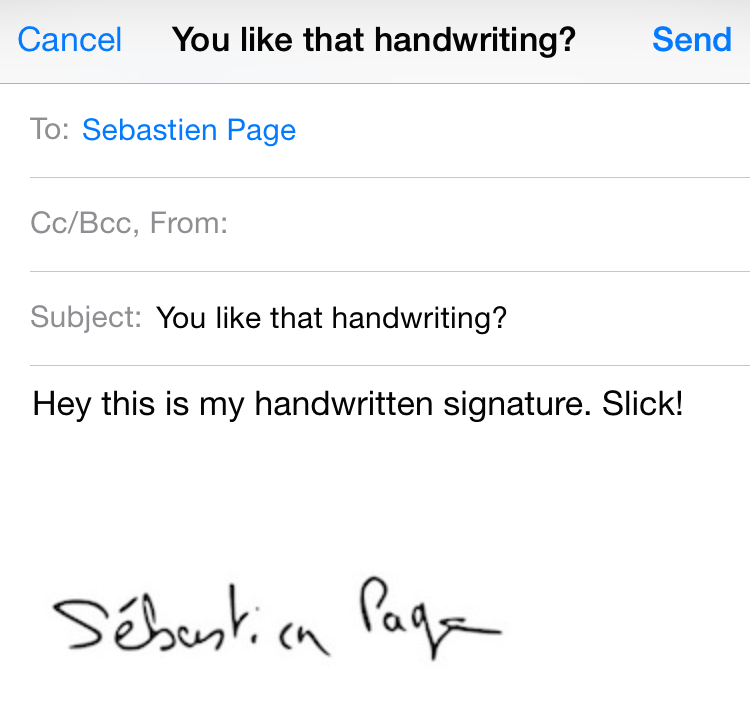
Step 4:Â Send yourself a new email from Gmail in the browser (or the other service you used), and obviously, make sure that you are sending this email with your new signature appended to it, as seen below.
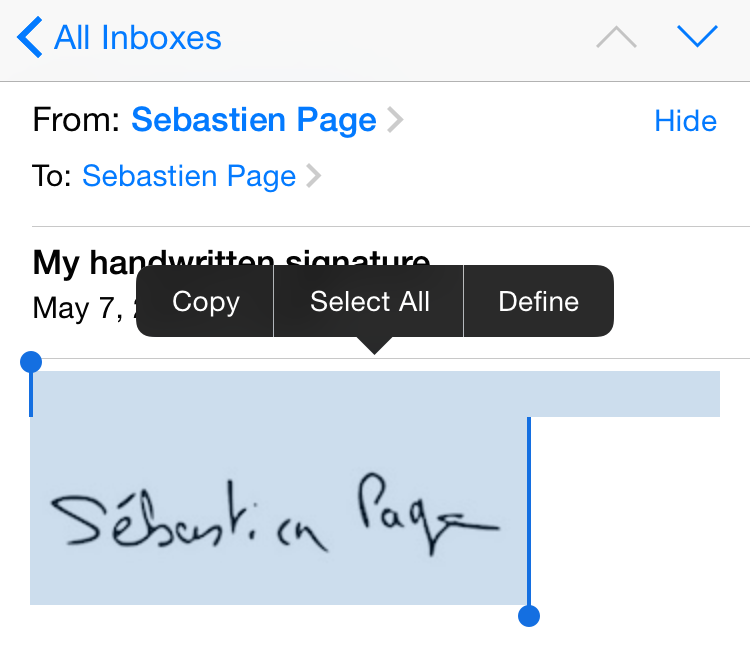
Step 5:Â On your iPhone or iPad, open the email you just sent to yourself containing the image of the handwritten signature. Copy the image as seen below, but make sure you copy it using the selection menu showed on this screenshot.
Step 6:Â On your iPhone or iPad, go to Settings > Mail, Contacts, Calendars > Signature, and paste the signature image inside the mail account you want to use it for.

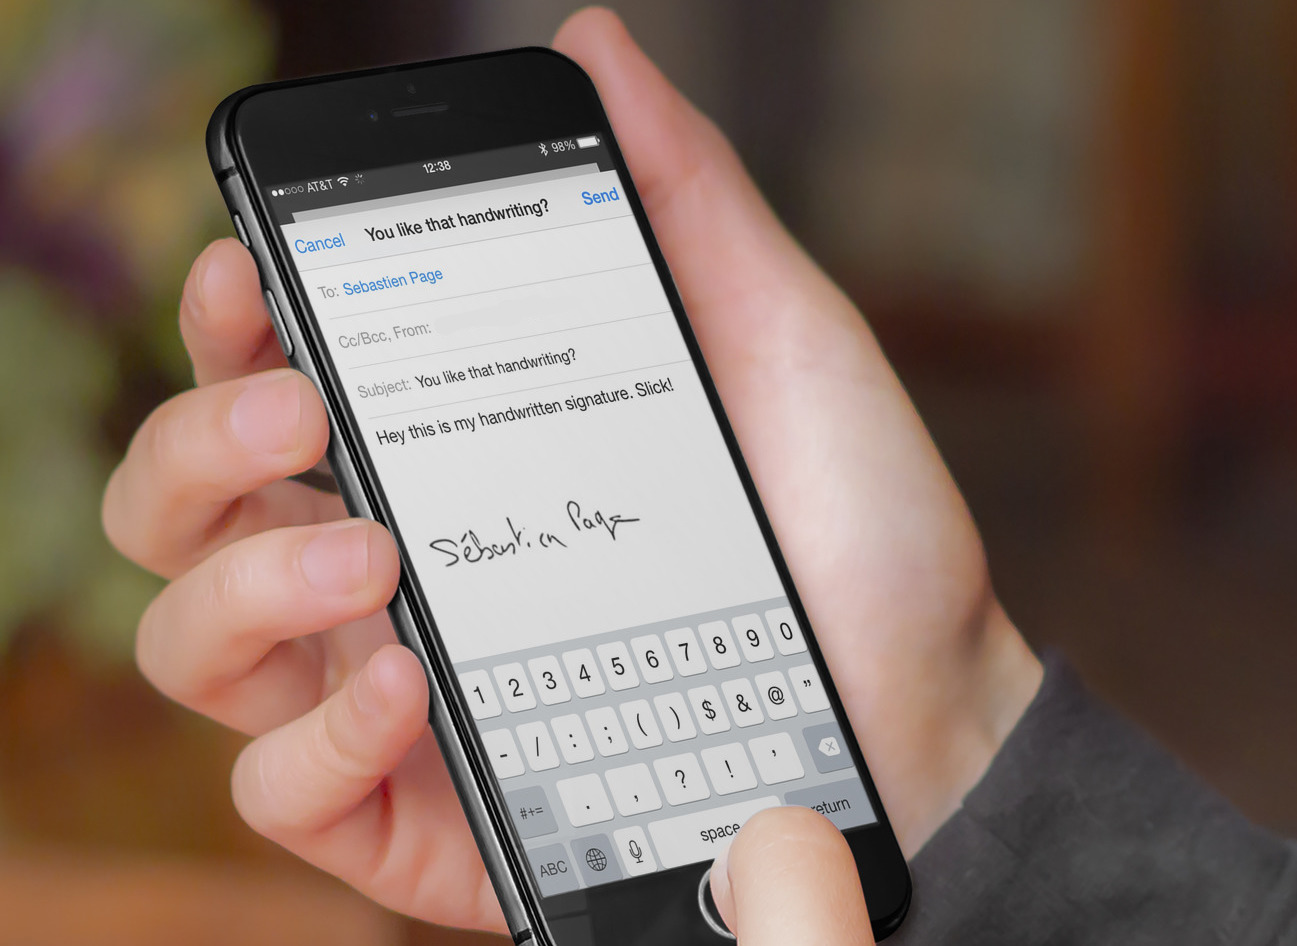
Step 7:Â To test your new signature, head over to the Mail app on your iPhone, and create a new email. If you followed the directions correctly, it should look like this:
You’re now free to replicate this signature or a variation of it on other email accounts you have on your iPhone or iPad.
Note that if the signature image doesn’t show up, or shows as a little square, it is because you didn’t properly copy it according to step 5 above.
This tutorial was created based on a problem one of our readers was having. If you have a problem or if you’re just not sure how to do something on your iPhone, Mac, Apple Watch, or Apple TV, send us an email at help@iDownloadBlog.com and we’ll see if we can be of any help. I also want to thank iDB reader Eric [2] for helping me troubleshoot some issues with the process of creating an email signature based on a handwritten signature.
Top Image: PlaceIt
No comments:
Post a Comment