The new Darkroom Photo Editor app [1] produced by Bergen Co. is a great option if you’re looking to move on from the basic photo editing apps and start refining your editing technique. This intermediate level app includes many of the basic features that you would expect from any editing app, while also including a proper “Curves†tool for refining your exposure levels. In this article you’ll discover how to use these editing tools to enhance your iPhone photos.
If you’re uncomfortable jumping into a more full-featured editing app such as Filterstorm Neue or Photoshop Touch, Darkroom might be just the app for you.
The app is free to download, with an extra in-app purchase if you want to use the Curves tool. Let’s go through a basic editing workflow to explore each of the editing options.
Select Your Image
The first thing you’ll notice upon launching Darkroom is that it doesn’t make you import photos into the app for editing. It simply opens with a view into your entire camera roll where you can select a photo (or you can select a specific album using the icon in the upper-right corner).
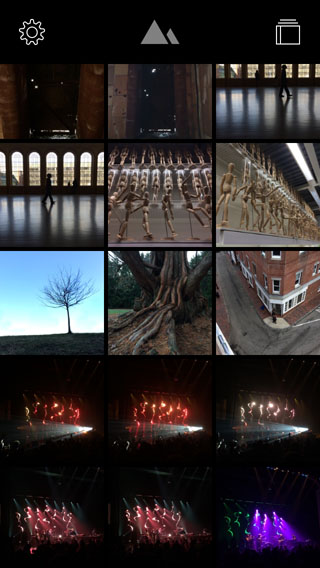
While this isn’t a huge timesaver, it’s little things like this that make for a more seamless, uncomplicated user experience. And this integration with the iPhone camera roll lends itself to another cool feature that we’ll see in a moment.
Crop/Rotate Tool
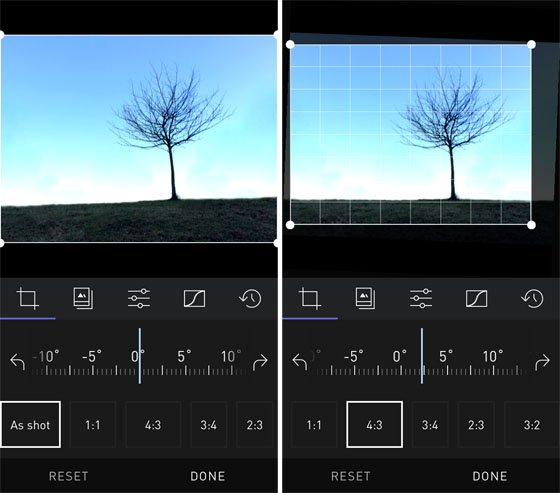
The first option on the toolbar is the Crop/Rotate tool. Like you’d expect, this allows you to crop your image using one of many standard aspect ratios. Notably absent, however, is the ability to perform a freeform crop without being tied to a specific aspect ratio.
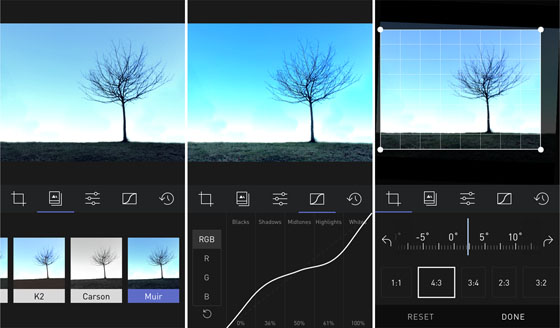
This tool also allows you to straighten your image in a subtle manner (as in the following images where I use it to create a level horizon). Or you can rotate the entire image in full 90 degree increments using the arrows on either side of the straightening wheel in the middle of the screen.
What is relatively unique about this tool is that you can make edits to both the crop and the rotation of the image in one place at the same time. This can be handy if you’re trying out several different options as opposed to going back and forth between two different tools.
Filters
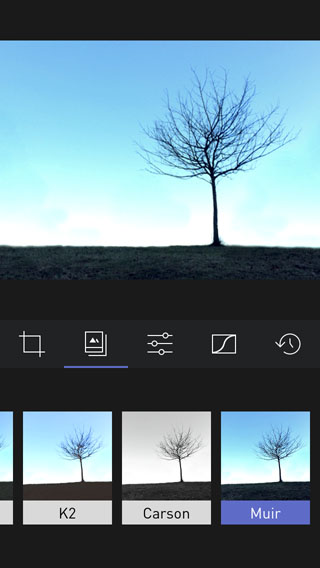
The next tool is a small, but effective collection of preset filters that you can apply to your images. While you can certainly select a given filter and call it a day, a better approach to using the filters is to treat them as starting points for your editing. Moving on to the next step will help to illustrate what I mean by this.
Adjustment Tools
In this next section, you’ll find all of the standard adjustment tools that you would expect from just about any editing app. You can make adjustments to any or all of the following settings using the available sliders: Brightness, Contrast, Saturation, Temperature, Vignette and Sharpness.

If you selected a filter preset in the last step, you’ll also notice that the starting values for each slider may be higher or lower than the neutral starting point. This is because selecting a particular filter preset will actually adjust these settings for you.
This is why I referred to the filters as being great starting points. You can see how they affect your image in specific, measurable ways. You can then make further adjustments using the sliders yourself.
Custom Filters
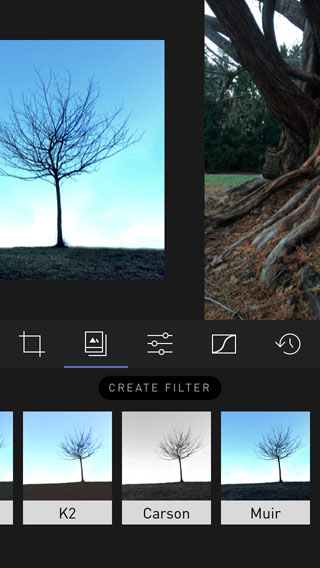
Another nice feature is that if you edit a photo using custom settings, you can save those settings as a new, custom filter that you can easily apply to additional photos later on.
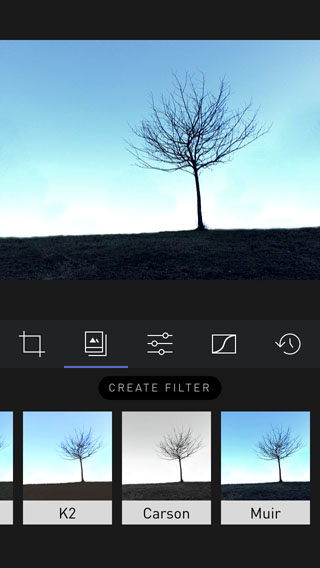
To do this, simply make your custom edits, then tap on the filter icon to go back to that menu, and you should see a new “Create Filter†option just above the filters. Tap on this and you’ll be prompted to create a filter name and then save the preset. It’s as simple as that!
Curves
The next feature to consider is also one of the key features that sets Darkroom apart from so many other apps. The Curves adjustment tool is typically only found in more advanced photo editing software such as Lightroom and Photoshop, although some high-end iOS apps include a version of Curves adjustment as well.
Curves is a powerful feature for making exposure adjustments from very subtle to extreme. To adjust the values, you simply slide your finger up or down in the different columns to move the indicator line or “Curve†and change the relevant value range.
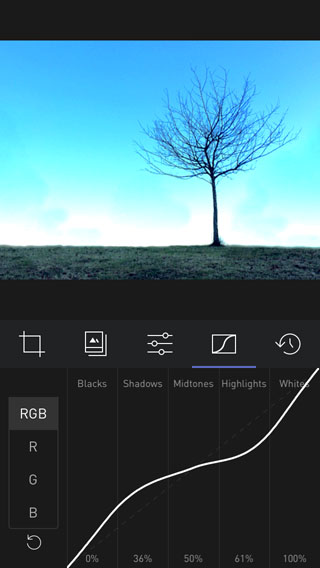
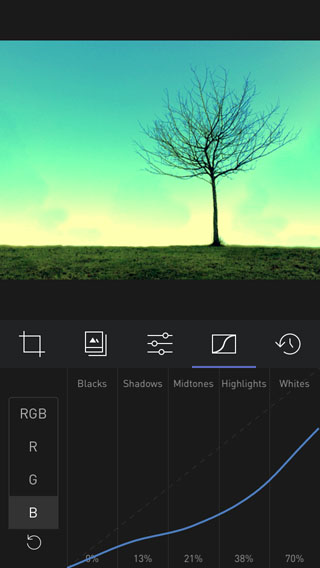
You’ll notice options on the left hand side where you can choose to adjust levels for different color values. R, G and B stand for Red, Green and Blue respectively, and allow you to adjust the level of each of those color values.
For example, as you can see in the following image, if you select the Blue setting and drop the levels down significantly, you are essentially removing most of the blues from the image, which allows the complimentary green hues to be more prominent.
In most cases, the RGB setting (above the separate R, G and B options) will be the most useful. This adjusts the exposure level of the entire image as opposed to specific color values (more like a custom brightness tool).
For example, you can use this to raise the brightness of the darker areas (shadows) of an image while leaving the rest of the image relatively untouched.
The range of editing possibilities with Curves are almost limitless, and it would be difficult, if not impossible to try and explain them all in this article. Only through experimentation can you start to discover all of the potential uses for this tool.
Save As Square
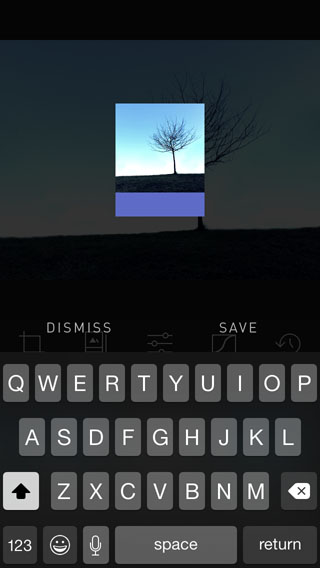
One last feature of note is that when you’re saving your image to the cameral roll or sharing it directly to Instagram or other social media sites, Darkroom offers the ability to automatically add white bars to the long edges of a non-square image, thereby making it into a square image.
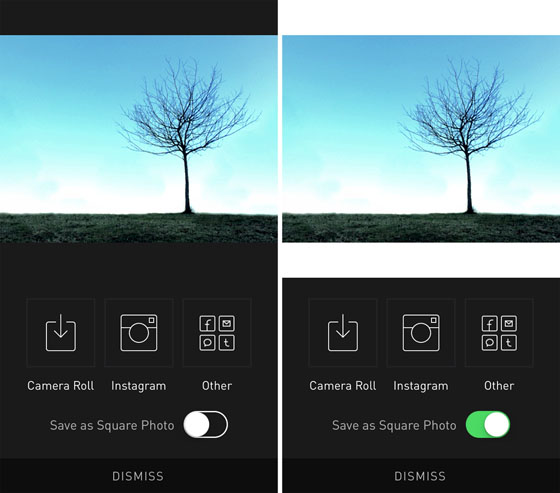
This is great for photo sharing sites such as Instagram which only allow you to upload square images. By adding white bars to the edges of the photo it allows you to easily upload your non-square images.
Non-Destructive Editing
One of the best features of Darkroom (in my opinion) is how it makes use of a non-destructive editing approach similar to that found in more powerful desktop software such as Adobe Lightroom.
Non-destructive editing simply means that your edits are all made “virtually†within the app and can be undone, reapplied and changed as much as you’d like, yet they are never applied to the original image until you choose to save a copy of that image with your finalized edits.
Infinite History
You can also access a full edit history for each photo that you’ve edited with Darkroom using the icon on the far right of the toolbar. This brings up a full list of every edit that you’ve made (for a given photo) in chronological order.
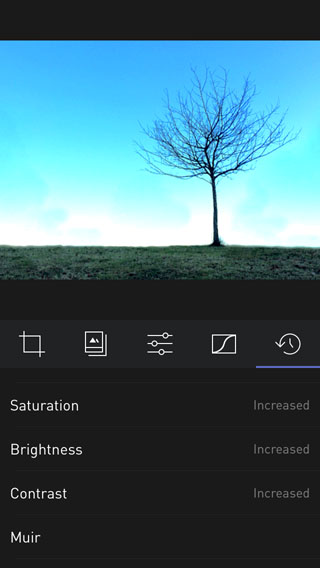
With a simple tap, you can revert to any specific step in your editing workflow for that image. There’s no limit to the number of steps that the app will record, so you can always return to a previous point in your editing process no matter how many changes you’ve made.
Working With Multiple Images
Remember earlier when I said there was another cool feature related to the integrated camera roll? In Darkroom, regardless of which tool you’re using (with the one exception of the crop/rotate tool), you can simply swipe left or right on your image to switch to the next or previous image in your camera roll (or whichever album you started with).
You can do this without saving your first image as all of those edits are still saved within the app for when you return to that image at a later time. This is a great option for working with several related images at once.
For example, if you want to try a custom preset filter on a number of images before saving them, you can easily do that by swiping back and forth to change images and apply the custom filter(s) to each as you go. Only when you Share/Save your image will it create a new (edited) copy in your camera roll.
Otherwise, regardless of what edits you’ve made to images within Darkroom, the edits will NOT appear on those same images in your camera roll. To be clear, while ALL edits are saved virtually within the app itself, they are not applied to your actual images in a permanent way until you choose to do so with the Share/Save feature.
Conclusion
There is much to like about Darkroom. The interface is clean and simple to use, yet it offers powerful editing features such as non-destructive editing and a Curves tool that are typically found only in higher-end applications.
Darkroom is available on the App Store for free [2] , but the Curves tool is only available as an in-app purchase for $2.99. This is probably the only real downside of the app. As the Curves feature is such a prominent aspect of the app, making it available as an optional purchase is a bit odd.
For what the app offers, I think it would be worth paying the $2.99 up front for the entire app and including the Curves feature with the initial purchase. Either way though, it’s worth the cost, and I highly recommend giving Darkroom a try.
Have you downloaded the Darkroom app yet? What are your thoughts on its editing features and have you paid to install the Curves tool? Please let us know in the comments section below!
If you also want to take great photos with your iPhone, please join 21,574 subscribers who receive our free iPhone photography email tips [3] that you won’t find anywhere on this blog.
28
FEB
Links
- ^ Darkroom Photo Editor app (itunes.apple.com)
- ^ Darkroom is available on the App Store for free (itunes.apple.com)
- ^ free iPhone photography email tips (my.leadpages.net)
No comments:
Post a Comment